Azure Application Insights - APM integration with Java Applications
The focus of this article is to detail about integration of Java based application monitoring into Application Insights.
The following is the Agenda :
1) Brief Introduction about Azure Application Insights
2) Setup a sample Java Application on WildFly server running on Azure Virtual machine
3) Publish the Application and allow it to be accessible from LAN (VNET) and Internet
4) Provisioning of Azure Application Insights
5) Integration of sample java application with Application Insights
6) Application Insights monitoring dashboards
If you are specifically looking for the integration of Java application with Application sights, skip the sections and have a look into Step : 5) Integration of sample java application with Application Insights
Application Insights
Application insight is a Microsoft Azure native APM monitoring tool which helps the developers and DevOps professionals to understand about the application performance and how it is being used.
Image Reference : Microsoft Official documentation

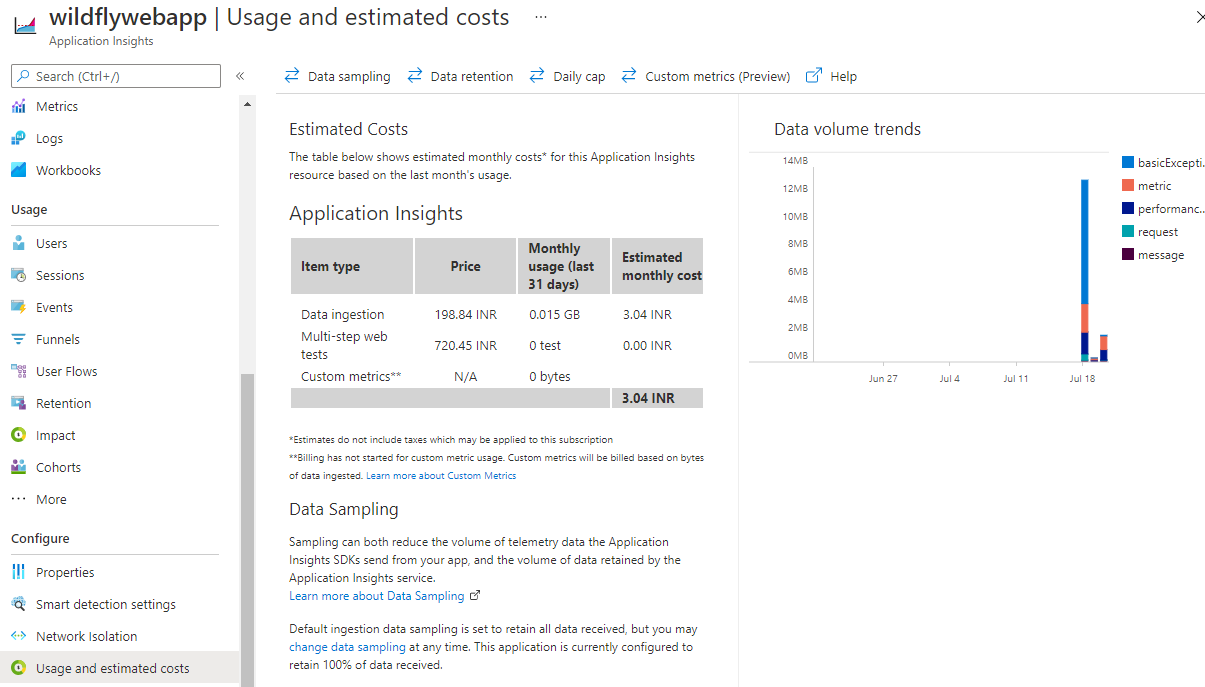
Application Insights is billed based on the volume of telemetry data that your application sends and the number of web tests that you choose to run, The telemetry data is billed per Azure Log Analytics data ingestion rates.

https://docs.microsoft.com/en-us/azure/azure-monitor/app/app-insights-overview
2 & 3) Setup a sample Java Application on WildFly server running on Azure Virtual machine
Here i’m going to host a sample java application on wildfly 20.4 installed on windows server 2019 azure virtual machine.
Step 1: Installing Azure windows virtual machine
Step 2: Install and configure Java & wildfly server
Reference: https://darrenoneill.eu/?p=594
For the testing purpose you could run the wildfly server from binary instead of installing it as a service.
I’ve copied the wildfly server directory into C:\
By default wildfly server listen on port 8080 for web service and 9990 for management console
Create a user account to login to Wildfly management console.
Navigate to C:\wildfly-24.0.0.Final\bin\ and run add-user.bat or add-user.ps1 (for windows OS)
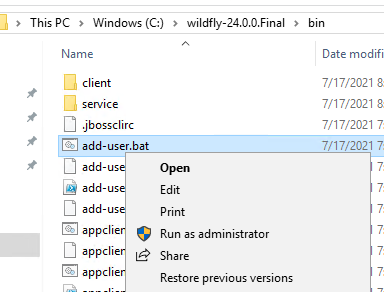
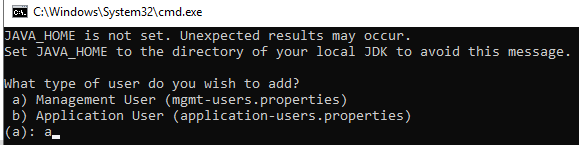

Hit enter and input the password while prompt in the interactive cmd window
Open a browser tab and access wildfly management console http://localhost:9990
Step 3: Host a Sample Java application
Download the Sample Web App war file from the link below Link.
Reference: https://github.com/AKSarav/SampleWebApp/raw/master/dist/SampleWebApp.war
Open a browser tab and access wildfly management console http://localhost:9990
Navigate to “Deployments” and drag & drop the Sample Web App war file into the right side pane which deploys the application in wildfly.
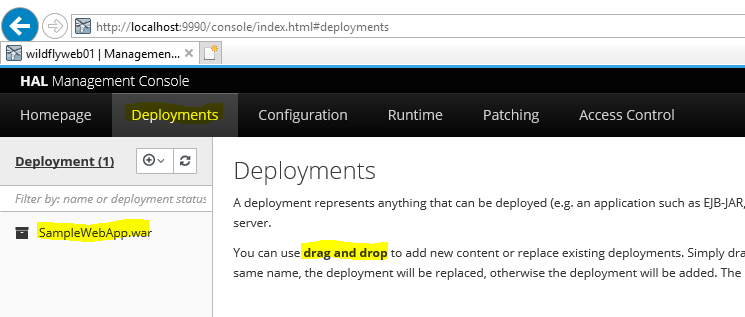
Open a new tab in the browser and try to access the webapp http://localhost:8080/SampleWebApp
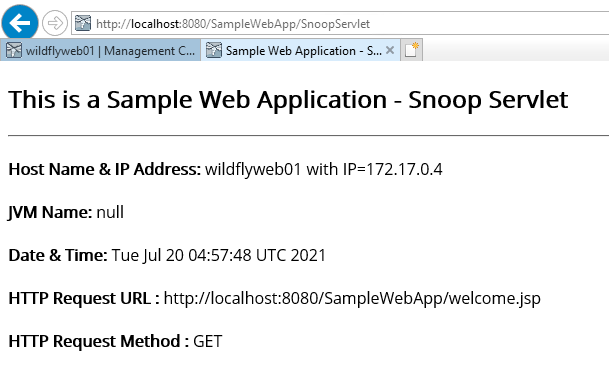
Step 4: Allow the WebApp to be accessible from LAN and internet.
Navigate to WildFly server root directory C:\wildfly-24.0.0.Final\standalone\configuration and open standalone.xml
Amend the following in standalone.xml
<interfaces>
<interface name="management">
<inet-address value="${jboss.bind.address.management:0.0.0.0}"/>
</interface>
<interface name="public">
<inet-address value="${jboss.bind.address:0.0.0.0}"/>
</interface>
</interfaces>

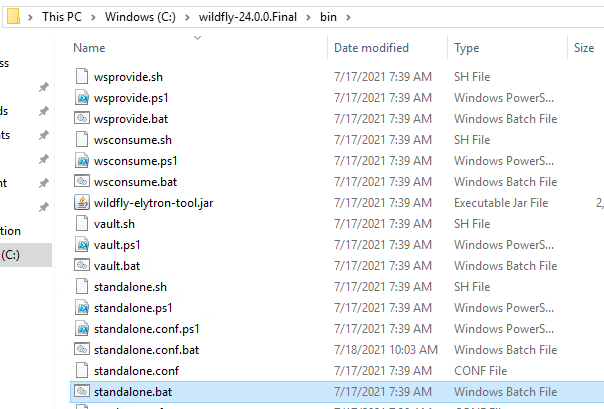
Restart the WildFly server by closing and re-ran standalone.bat file under C:\wildfly-24.0.0.Final\bin
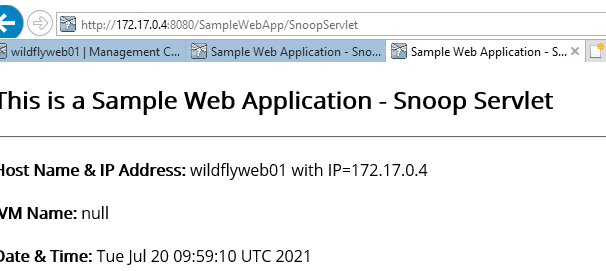
Now you will be able to access the webapp using the network interface IP address of your virtual machine.
Step 5: To Allow your webapp to be accessible from Internet
SInce it is a lab I'm exposing the virtual machine directly to the internet which is not at all recommended on any cloud hosted environments.
Application gateway, Proxy, Firewall, load balancer or any other flavor of load balancers can be added in front of your virtual machine based on your wish to secure the traffic
Whitelist port 8080 on windows firewall (check IP tables if you’ve choose Linux)
Open a powershell window and input the below command
New-NetFirewallRule -DisplayName "ALLOW TCP PORT 8080" -Direction inbound -Profile Any -Action Allow -LocalPort 8080 -Protocol TCP
Open port 8080 on Azure network security group attached to virtual machine on subnet.

Get the public IP address associated with the virtual machine and access it from your local computer to make sure it is accessible.
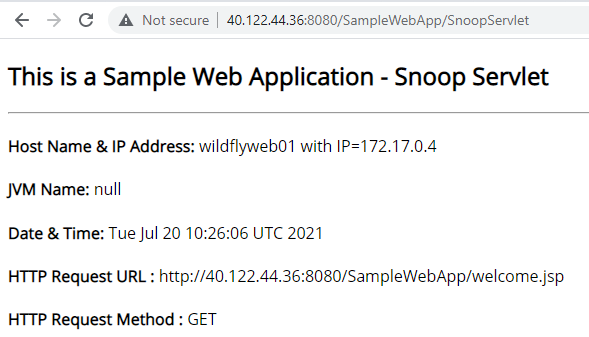
Now your infrastructure and application is ready to explore Application insights.
4) Provisioning of Azure Application Insights
Login to your Azure subscription and on the search bar type “Application Insights” then click on the create button.
Here I’m going to create a classic Application Insights which is going to be deprecated in the near future, you could try out the one which is work-space based (ie use Log Analytics work space).
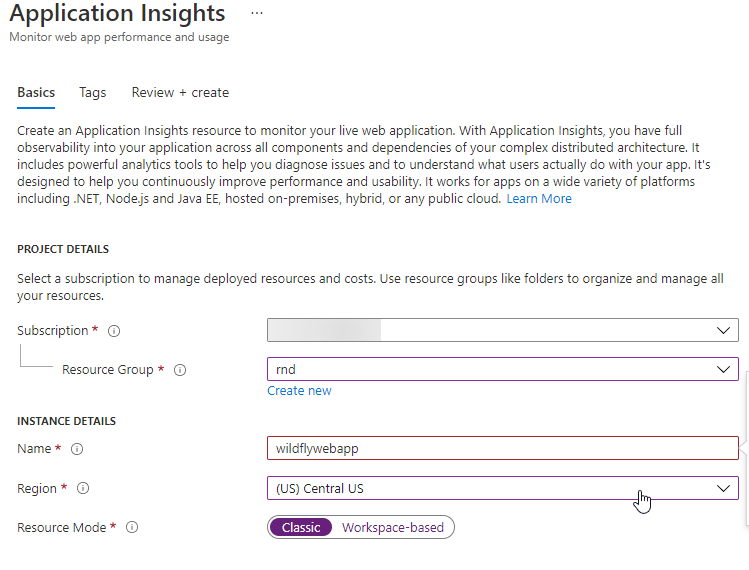
Fill up the basic details and click on review and create.
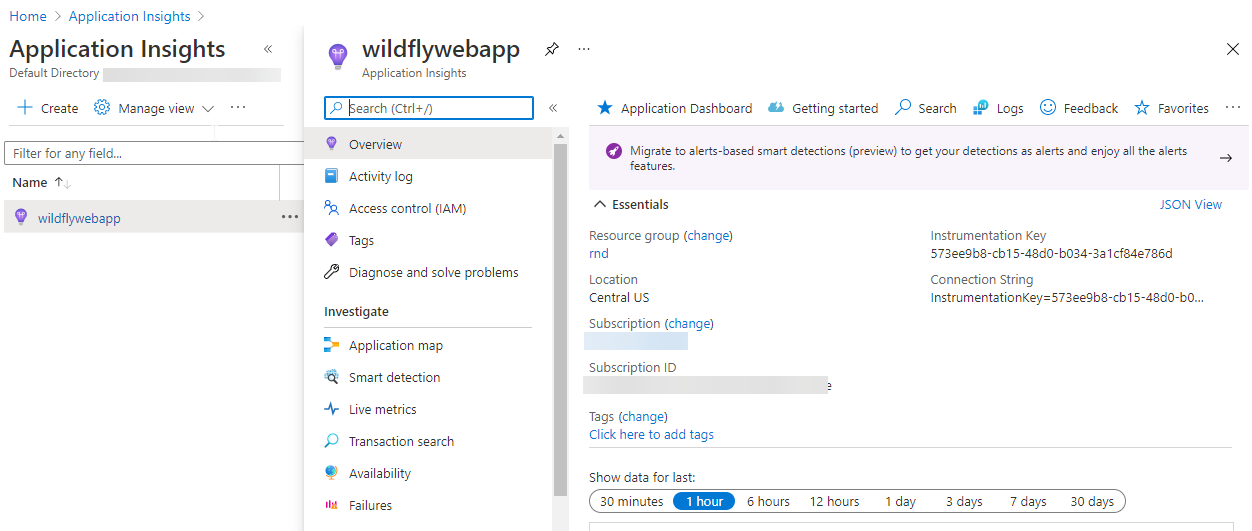
5) Integration of sample java application with Application Insights
Configure Application Insights JavaAgent on WebServer
The Agent configuration can be done in 2 ways: inserting a piece of code into your application code but it is now old school.
So we will be using JavaAgent (Agent based monitoring which captures heath, state and performance of the application from inside of it).
Login to the virtual machine, create a directory for AppInsight under any volume, download and copy the agent into it.
Download JavaAgent provided by Microsoft from the below link

Create a new file with name and extension applicationinsights.json
Strictly follow the naming convention (applicationinsights) and file extension (json)
The file must be placed in the directory/folder on which the applicationinsights-agent-3.1.1.jar file is copied.

Login to Azure portal → Application Insights → Your application insights → Overview → copy the connection string.
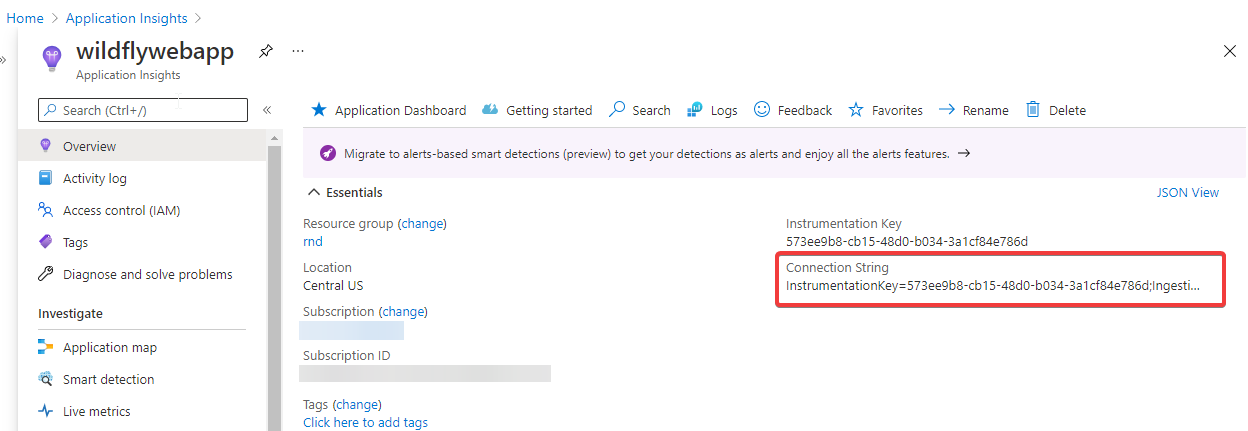
Login back to the virtual machine -> Navigate to the file applicationinsights.json and open it in a notepad or notepad ++ → copy eth connection string as shown below and save the file

Navigate to “”C:\wildfly-24.0.0.Final\bin” and open “”standalone.conf.bat” file.
Input the following parameters into the file.
set "JAVA_OPTS=-javaagent:C:\wildfly-24.0.0.Final\AppInsight\applicationinsights-agent-3.1.1.jar -Xms768m -Xmx6144m -XX:MetaspaceSize=1152M -XX:MaxMetaspaceSize=3072m"
Refer the below article for the java-standalone-arguments
https://docs.microsoft.com/en-us/azure/azure-monitor/app/java-standalone-arguments
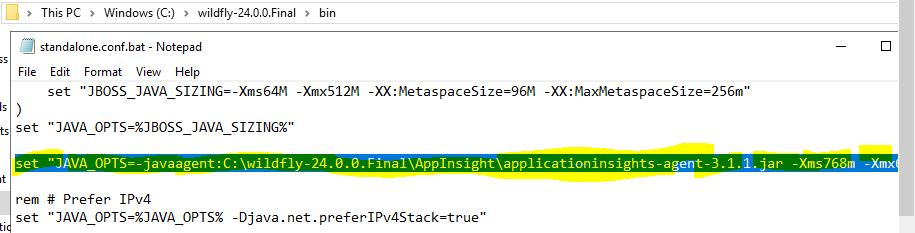
Restart the WildFly server by closing and re-ran standalone.bat file under C:\wildfly-24.0.0.Final\bin
When the wildfly server boots up you will be able to find the below in the cmd.

It means your configuration is loaded as expected and soon it will start sending application telemetries to the Application Insights.
Navigate back to the AppInsight directory and you could see a log file “applicationinsights.log”
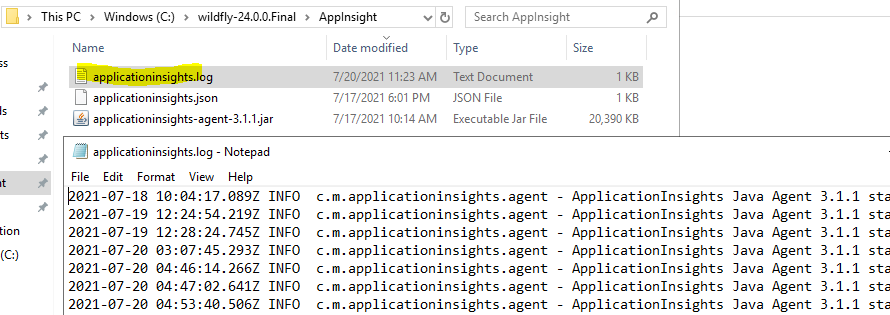
Repeat above steps on all other virtual machines hosted with same application parse the logs and telemetry to Application Insights
6) Application Insights monitoring dashboards
The focus of this write up is to help developers or DevOps/Cloud engineers to integrate java based applications into Azure application Insights APM.
Few screenshots from Application Insights to understand about the basic capabilities of the Azure services offering.
Overview of your Application performance

Application map (display various components and integration in the App)

Live Metrics from your App

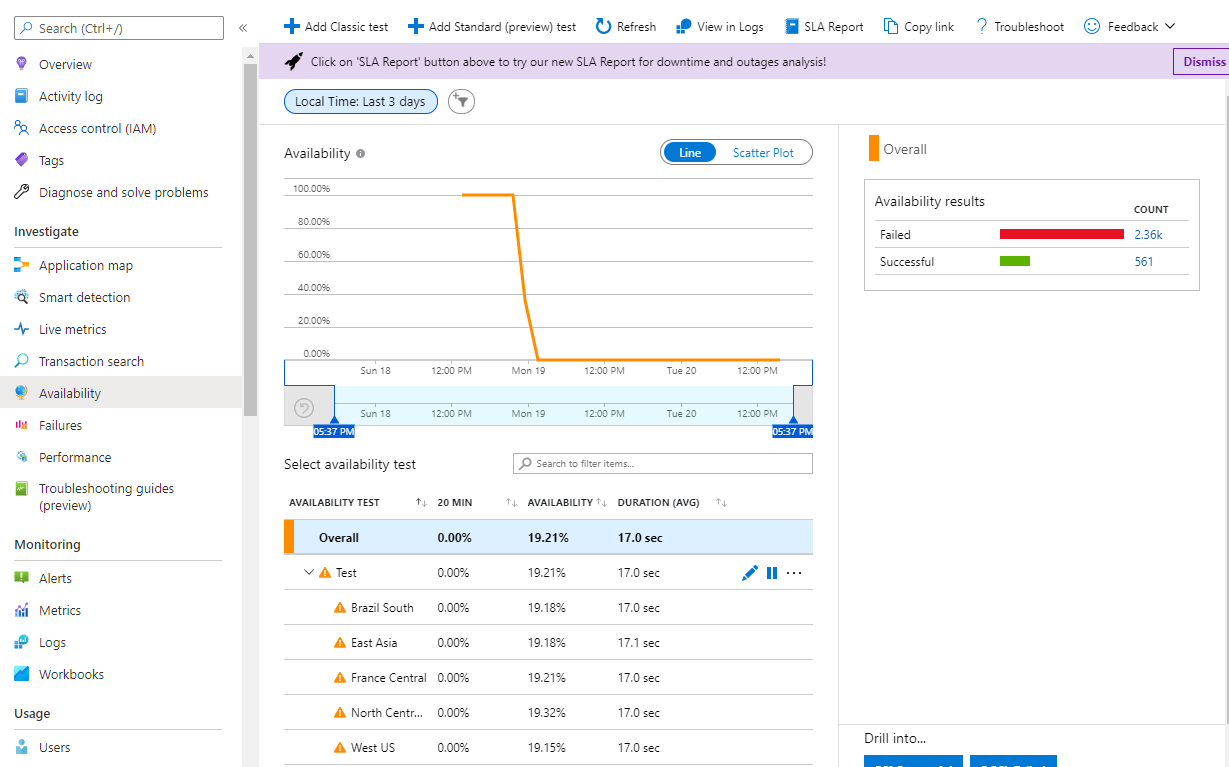
Availability of the Application from different geographic regions.
You could create a classic or standard rule to measure the availability of the application.
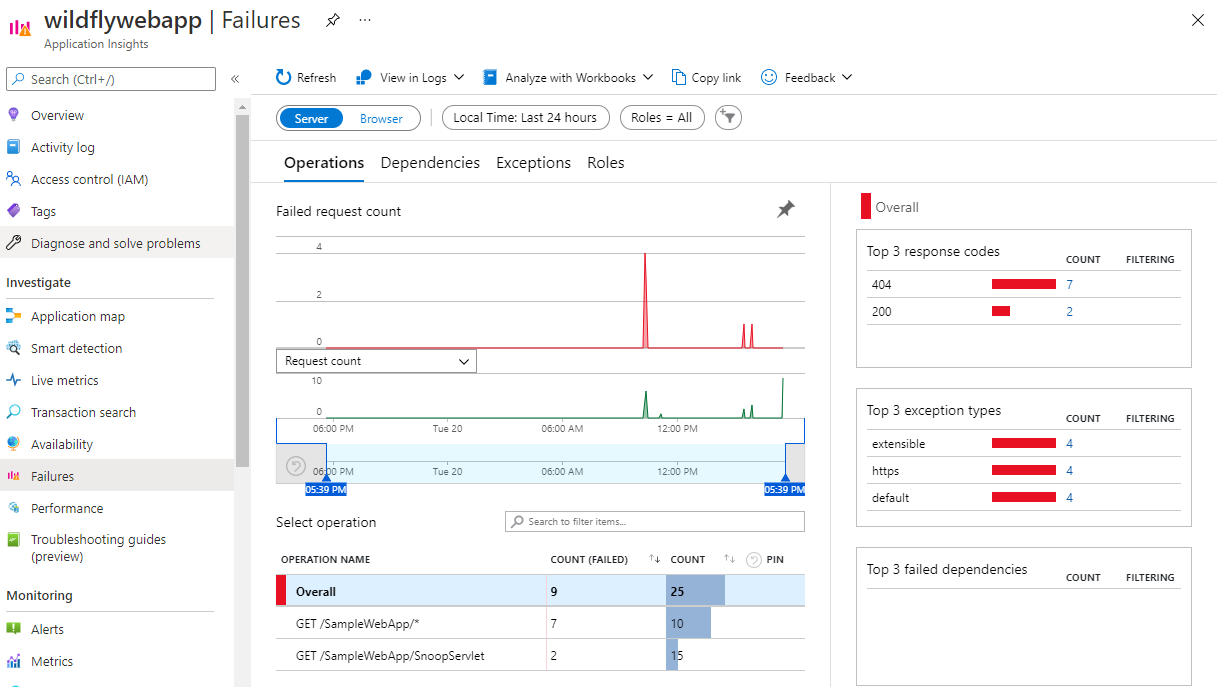
Failures within the Application
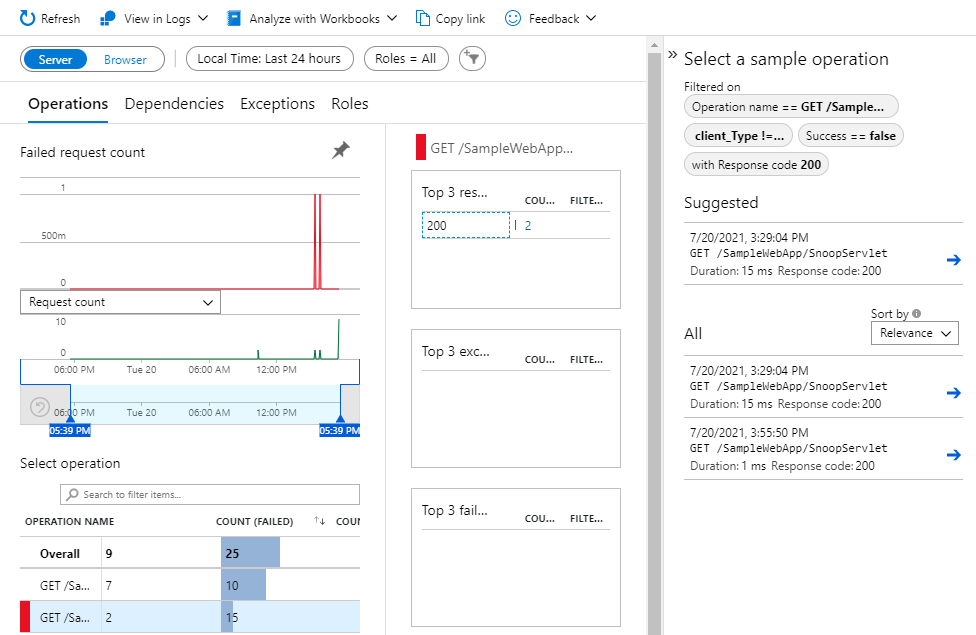
Drill down reports for each case.
Performance of the Application

Number of Active session to the Application
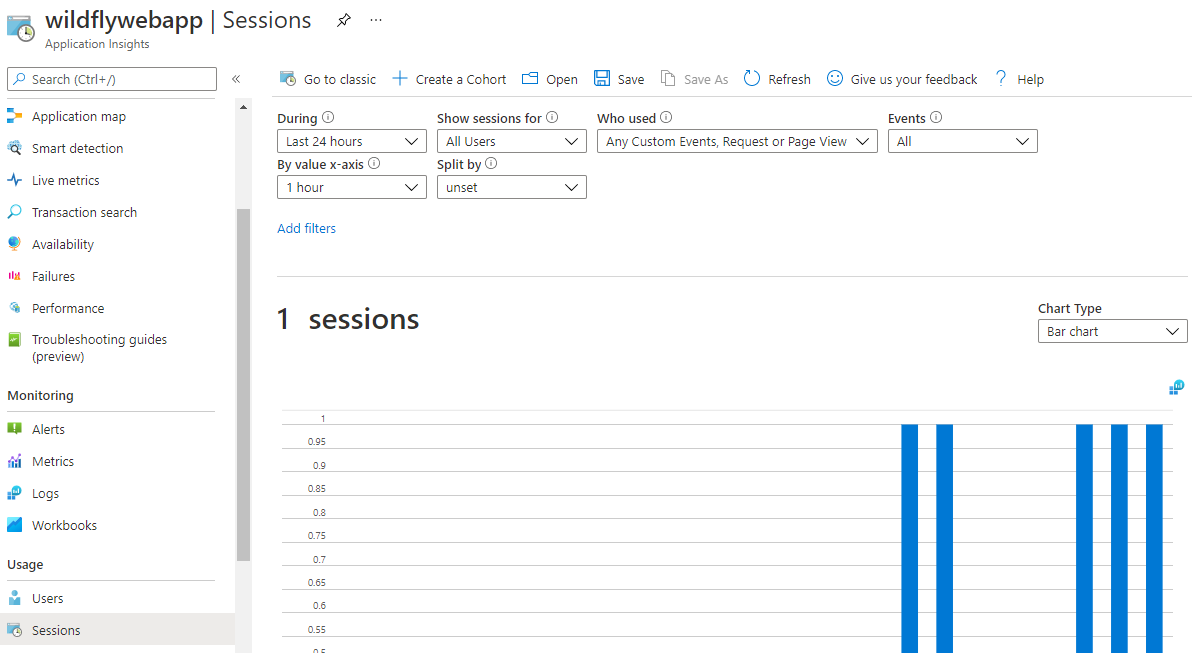
A report on usage cost
Thanks for reading and Hope it helps.
Reference :
https://docs.microsoft.com/en-us/azure/azure-monitor/app/app-insights-overview
https://darrenoneill.eu/?p=594
https://github.com/AKSarav/SampleWebApp/raw/master/dist/SampleWebApp.war
https://docs.microsoft.com/en-us/azure/azure-monitor/app/java-standalone-arguments


